A blog for those who think food should be fun... for those who cook it and those who consume it. Tips, recipes, ideas and suggestions, links to the best ideas in food, best places to find food,and a place to find new ways to make memories with food whether you are a novice or an expert.
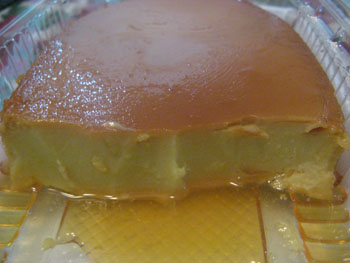
The original leche flan recipe was from my Mom but my sister Lorna reconfigured it to fit her tastes.
The perfect flan is such that when you slice through it, it barely quivers like jello. There is very little syneresis, that is, no weeping (or lots of holes in it!). I am sharing this precious recipe so you may prepare it for your family.
5 eggyolks
2 eggs
1 can condensed milk
1 can water (use the condensed milk’s can for measuring)
1 tbsp. vanilla to add to the mixture
1/4 cup to 1/3 cup sugar for caramelization
Get a pyrex loaf dish (or equivalent oval, square, or round dish).
Caramelize 1/3 cup sugar in it. Use your oven. When the sugar is starting to melt, make sure that you watch carefully. You don’t want the caramel to be too dark or it will taste burnt. Manipulate the dish until you are sure that the caramel is evenly placed on the bottom of the pan. Let the pan rest on the stove top.
Pre-heat the oven to 325 degrees Fahrenheit.
These are the cooking times:
For the first 45 minutes: 325 degrees Fahrenheit
For the next 20 to 25 minutes, until the toothpick test shows that the flan is done: 350 degrees Fahrenheit
Procedure:
1. Separate 5 eggyolks when the eggs are cold. It’s easier to get the whites and the yolks separated. Set the whites aside to use for Flan de Huevos Blancos or Angel Cake.
2. In a mixing bowl, mix the eggyolks, eggs, condensed milk, water, and vanilla until well-blended. Set aside for a few minutes so that the mixture reaches room temperature. Do not beat up the mixture to form bubbles. Just try to make sure that the eggwhites are blended in.
3. While waiting for the mixture to reach room temperature, prepare your baine marie (bano maria).
Get a rectangular roasting pan that is slightly taller than the baking pan that you are using for your flan. Put this roasting pan inside your pre-heated oven. Add water to the pan, about mid-way. Be careful that you don’t splash water around as you heat this pan of water.
4. Get a small rounded double-meshed metal strainer, as finely-meshed as you can find them (similar to the strainer that comes with a wok). This is the secret of the recipe.
5. Get a bowl and put the strainer over it. Spoon (with a 1/4 cup measuring cup) the mixture over the metal strainer. With a rubber scraper, smoothen any eggwhites through the strainer. Using a wooden spoon (or other mixing spoon), blend the smooth mixture.
6. When you have finishing straining the mixture, blend the muixture with your wooden spoon one last time. Try not to produce any bubbles while doing this.
7. Pour the mixture on your prepared caramelized pan. It should have a thick, liquid “feel” to it.
8. Open your oven and pull out the rack with the roasting pan (that has hot water on it).
Position the Leche Flan’s pan into the center of the roasting pan.
9. Bend a little and check the height of the water around the Leche Flan’s pan. You might need to add more water (using your measuring cup) so that the water outside the pan reaches the height of the leche flan. This is the secret to having very little syneresis (or “weeping”).
10. Remember:
For the first 45 minutes: 325 degrees Fahrenheit
For the next 20 to 25 minutes, until the toothpick test shows that the flan is done: 350 degrees Fahrenheit
11. When you take out the cooked Leche Flan from the baine marie, be careful not to splash water around. Set the pan on top of the stove or counter to cool down.
12. Taking the Leche Flan out of its pan:
Many a Leche Flan is destroyed by the baker not knowing how to take it out of its pan.
Refrigerate the cooled-down leche flan until you’re ready to unmold it.
Unmolding the Leche Flan: Run a straight-edged (non-serrated) knife on the sides of the Leche Flan. Place a piece of plastic wrap over the top of the Leche Flan and press down ever-so-gently on the surface of the flan. Let the caramel from the bottom of the pan run through the sides of the pan. Get a pan of hot water and let the leche flan’s pan rest gently on this water bath for a few minutes. The rest of the mixture is cold and only the bottom is hot. This is done so that the unmolding is faster — and smoother. Take out the plastic wrap. Take your serving platter and place over the Leche Flan. Invert the mixture in one quick move.
13. You can garnish the Leche Flan with some macapuno strings or langka strips (preserved jackfruit) if you like.
Hoping you all are successful in making Leche Flan.
The perfect chocolate cake has just the right amount of that chocolate-ness and fudge icing. I often bake this cake during birthday celebrations. Sometimes my relatives order this cake but I avoid baking for profit. I bake out of love.
Here I will share the cake recipe and the fudge icing.
The Chocolate Cake Recipe
Ingredients:
Mix A- Mix below
1 cup Hershey’s Cocoa
2 cups Boiling water
(mix the above till smooth then cool)
Mix B- Mix well in plastic
2 3/4 cups sifted all purpose flour
2 teaspoons baking soda
1/2 teaspoon baking powder
1/2 teaspoon salt
- Prepare the rest of the ingredients below
1 cup butter, softened
2 1/2 cups brown sugar
4 pieces eggs
1 1/2 teaspoon vanilla
Procedure:
1. Cream butter; add sugar gradually. (Make sure butter is soft when starting to cream). Cream till light and fluffy.
2. At low speed, add eggs, one piece at a time, mixing thoroughly after each addition. Add vanilla.
3. Add Mix B in fourths and Mix A in thirds alternately, ending with Mix B.
4. Bake at 350 F for 25-30 minutes in two or three 9″ round layer pans. Cool 10 minutes. Turn out onto wire rack.
5. Add fudge icing (see recipe below) to the top of one layer then combine the two layers to ice the whole cake.
The Fudge Icing
Ingredients:
1 can condensed mik
1/2 cup cocoa
1/4 cup butter
1. Mix milk and cocoa with wire whisk or wooden spoon until smooth. Strain through a wire strainer.
2. Cook mixture in double boiler. Stir occasionally- when thick, remove from fire and add butter thoroughly.
3. Add desired flavor.
4. Use this icing right away. Keep bowl in double boiler to maintain warmth.
Other notes:
1. You can decrease the cocoa down to 1/3 cup.
2. Icing starts getting thick when you see thick icing clinging to the sides of the bowl. Continually scrape sides of bowl until icing becomes very thick.
3. Do not over cook or else you will have a fudge candy.
Another Fudge Icing Recipe
3/4 cup sugar
1/3 cup cocoa
3 tablespoons cornstarch
1 cup evaporated milk ( or 2/3 cup evaporated milk + 1/3 cup water)
1 Tablespoon butter
vanilla
1. Mix sugar, cocoa, cornstarch and milk making sure there are no lumps.
2. Cook until thick.
3. Take away from fire and add butter and vanilla. Mix well
(Tip from Lisa, a reader: It should be noted that the icing should be cooked over the lowest heat, stirring constantly until it is thick enough to coat the back of a spoon without dripping. The icing does thicken as it cools so it must be stirred every now and to prevent a film from forming on the top. It may take a couple of times to learn when to stop cooking it, but I think it’s well worth the effort. )
Update- It seems most of the readers can’t get to make fudge icing the right way. I will give you another chocolate icing recipe to use called Easy Chocolate Icing
1/2 bar of butter, softened
1/2 cup cocoa
1/4 teaspoon salt
4 cups powdered sugar (confectioners’ sugar)
4 tablespoons (more or less) HOT water (boiling hot water preferred)
Directions:
1. Cut in margarine with cocoa, salt and powdered sugar until it resumes the size of cornmeal
2. Add water, 2 tablespoons at a time mixing until smooth.
NOTES:
*The icing can be used to simply frost or pipe out designs on the cakes. Just add more powdered sugar.
* It is very important to sieve the sugar before using
Author: JOHN REY
| Posted at: 6:56 PM |
Filed Under: PHILIPPINES,
RICE
|
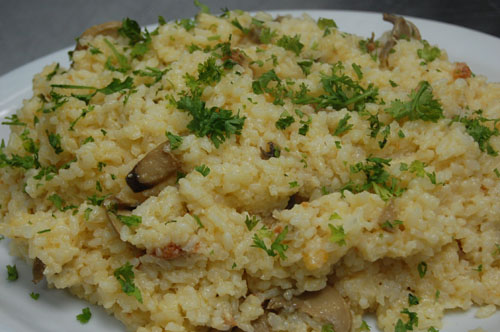
120 grams sliced mushrooms
30 grams butter
30 ml corn oil
60 grams chorizo Bilbao or Italian chorizo, thinly sliced
450 grams Italian Arborio Rice or Japanese Rice
1500 ml chicken stock
15 grams butter
100 grams parmesan cheese, grated
To taste iodized salt
Procedure:
For the Risotto
1. Heat the butter and oil in a medium brazier or a saucepan over medium-low heat. Add the chopped onion and chorizo slices and sauté for about 2 minutes. Do not brown.
2. Add the rice and sauté until well-coated with the fat.
3. Using a small ladle, add a ladle full of the chicken stock to the rice. Stir the rice until the stock is absorbed and the rice is almost dry.
4. Add another ladle of the stock and repeat procedure. Do not add more than a ladle of stock at a time.
5. Stop adding stock when the rice is tender but still firm. It should be very moist and creamy, but not runny. The cooking should take about 25 to 30 minutes.
6. When done, remove from heat and stir in the butter, parmesan cheese, and salt to taste.
7. Serve hot.
Recipe is only for your personal use. Copyright of the recipe belongs to Culinary Institute of Aristocrat (CIA) . CIA, a boutique school , a culinary school in Manila has two flagship courses: offers “Fundamentals of Culinary Arts,” and “Home Bakeshop: From Concept to Operation.” It is a member of the International Association of Culinary Professionals, World Association of Chefs Societies, National Restaurant Association, American Culinary Federation. For more information about CIA, inquire at any branch of Aristocrat Restaurant or email culinaryinstituteofaristocrat@yahoo.com.
Author: JOHN REY
| Posted at: 5:24 PM |
Filed Under: CHICKEN,
SINGAPORE
|
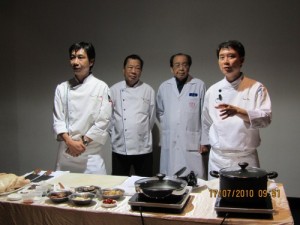
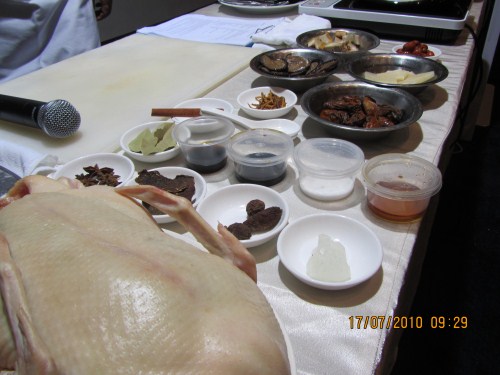
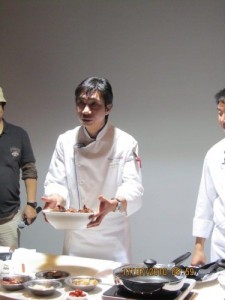
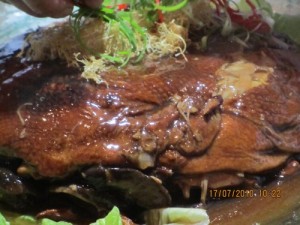
During the Singapore food festival 2010, I had the pleasure of meeting the Heavenly chefs (Mr Sin Leong and Mr Hooi Kok Wai of Dragon Phoenix and Red Star Restaurant) to showcase three very authentic and old school Cantonese dishes not popularly found today in menu menus like the Shunde Wild Pheasant , the Deep Fried Golden Pearls and a good old traditional braised duck. These recipes are not for beginners but of course you can try them.
Origin of the traditional braised duck
In Canton province of China, during festivals such as Cheng Ming, harvesting, etc., people used to gather in the ancestral hall to celebrate and thanks their ancestors for blessings given.
On such occasions, foods such as roast duck, roast meat, chicken etc., were brought as offerings. After some prayers, all these foods were placed into a big pot and stewed into a pot-luck delicacy where people gather around sharing the joy of the occasion.
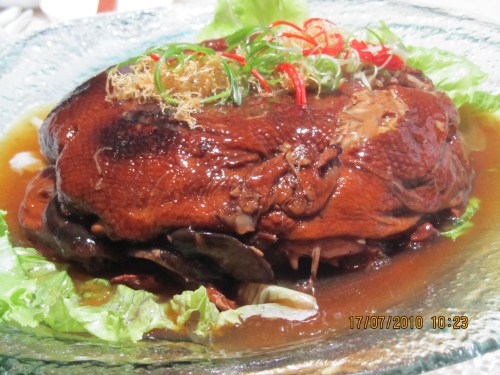
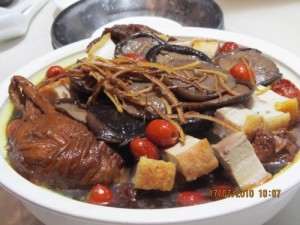
Such practices initiated the creation of the famous Cantonese Dish “Peng Cai”. The “Traditional Braised Duck” is one of these “Peng Cai” dishes which uses duck as the main ingredient.
Besides offering a harmonic combination of textures and flavors, this dish has a symbolic cultural significance as it symbolized unity and the sharing of joy. In the 40s, this dish was “migrated” together with a group of Cantonese immigrant into Singapore and became a popular dish in Chinese banquets.
In the Philippines, we also get to eat Braised duck in our Chinese restaurants. You will see here in the cooking method why one needs to order duck dishes a day in advance.
Ingredients:
1. Fresh Duck 1 number (approx. 2kg)
2. Dried Oysters 12pcs (soak in water to rehydrate, pan-fry)
3. Preserved Vegetables 125g (soak in water to rehydrate, slice into 12 pcs)
4.Red Dates 12pcs (rinse with water, remove seeds if any)
5. Roast Meat 12pcs
6. Shitake Mushroom 12pcs
7. Dried Orange Skin 1pc (approx. 5g soak in water to rehydrate, fine Julian cut)
8. Water 2kg
9. Rock Sugar 1pc (approx. 30g)
10. Hua Diao Wine 40g
11. Salt 10g
12. Soya Sauce 100g
13. Cooking Oil 3kg
14. Ginger 1pc (approx. 30g, smashed)
15. Spring Onions 2 stocks
16. Dried Bay Leaves 2-3pcs
17. Dried Amomum Fruits 2-3pcs (also known as cardamnon)
18. Star Anise 2pcs
19. Cinnamon Stick 1pc
20. Cornstarch 2 tbsp
21. Water 50ml
Cooking Method:
1. Clean duck (ingredient 1) with water, cut duck open from back, apply soya sauce evenly on the duck (ingredient 11), set aside, ready for use.
2. Heat up a wok of oil (ingredient 13) bring temperature between 180°-200° C, deep-fry the duck till golden brown
3. Place whole duck into a large casserole, rinse duck in water to remove excess oil.
4. Strain away excess water, add ingredients 8-11, and ingredients 14-19 into duck.
5. Place duck into steamer and braise duck for 2hrs. till soft; thereafter, remove back & breast bone.6. Place ingredients 2-7 into duck.
7. Place duck back into the steamer and braise duck for another 45mins.
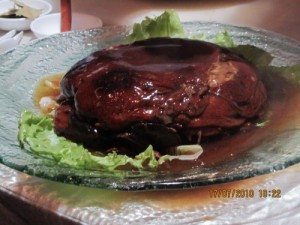
8. Thereafter, flip casserole on to a big plate, drain off juice into a bowl, and remove casserole.
9. Pour juice into cooking pan, heat up to reduce the juice into sauce, thicken with corn starch, pour sauce on duck before serve
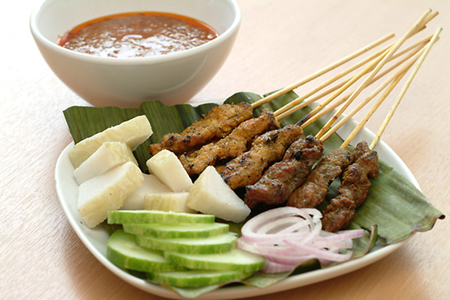
I am sure you want to learn recipes from other countries. One of my favorite Singapore dish in the 2010 Singapore Food Festival is Satay. It is skewered barbecued meat, usually chicken (Satay Ayam), beef (Satay Lembu) and mutton (Satay Kambing), dipped and eaten with a delectable peanut sauce. Satay originated from Indonesia but also popular in many other Southeast Asian countries, such as: Malaysia, Singapore, Brunei, Thailand, the southern Philippines and in the Netherlands, as Indonesia is a former Dutch colony.
INGREDIENTS
For satay:
1/2 cup soy sauce
1 large onion, chopped
1 stalk lemongrass, minced
1 tablespoon peanut oil
1/2 teaspoon turmeric
2 cloves garlic, minced
1 1/2 teaspoons brown sugar
1 fresh ginger, peeled and sliced
1 teaspoon ground cumin
1 teaspoon salt
1 teaspoon black pepper
1 kilo chicken or beef, sliced into 2-inch portions
Bamboo skewers
For peanut sauce:
1/2 cup salted roasted peanuts
1 medium onion, chopped
1 clove garlic, minced
1 stalk lemongrass
Vegetable oil
1 cup coconut milk
1/2 cup peanut butter
1 teaspoon brown sugar
2 teaspoon dried tamarind, soaked
1 teaspoon salt
PROCEDURE
For satay:
1. Make the marinade by mixing soy sauce, onion, lemongrass, peanut oil, turmeric, garlic, brown sugar, ginger, cumin, salt and pepper in one large bowl.
2. Coat sliced meat with marinade. Keep marinated meat inside the refrigerator overnight.
3. To keep bamboo skewers from burning while barbecuing, soak them in water an hour before inserting them into the meat,
4. Thread 4 to 5 pieces of marinated meat through the soaked skewers.
5. Cook over hot coals with a barbecue grill. Turn meat frequently and brush with the leftover marinade until the meat is cooked.
For peanut sauce:
1. Put peanuts, onions, garlic, and lemongrass in a blender and grind to your preferred consistency.
2. Saute the mixture in vegetable oil for 5 minutes while stirring frequently, and then mix in the coconut milk.
3. Bring to a boil.
4. Add the peanut butter, brown sugar, dried tamarind and salt.
5. Let it simmer for 2 minutes, and then serve with slices of cucumber and onion.
The Satay and Hainanese Chicken Rice recipes are just simple tastebud teasers to give food lovers an idea of what the annual food festival has to offer. After savoring a preview of what Chinese cuisine-infused Singaporean food is all about, expect a bigger culinary feast in next year’s Singapore Food Festival.
Author: JOHN REY
| Posted at: 12:26 AM |
Filed Under: CHICKEN,
SINGAPORE
|
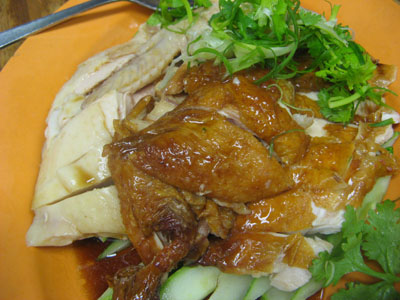
Hainanese Chicken Rice is one of the primary specialties of Singapore and is often considered the country’s national dish. Filipinos love it for its flavorful, uncomplicated taste. Every time I am in Singapore, I always order Hainanese Chicken Rice. Mixing the chicken meat with the dip with the rice was just so heavenly. It must be the ginger and garlic flavors that brings out the flavors.
A Singaporean describes it this way: Part of the whole ritual in eating this dish is smothering your cream-coloured chicken fat laced rice with ribbons of sweet dark soy sauce, chilli sauce and pounded ginger and to mix it all together, matching flavour for flavour.
Let me share this simple recipe which I am sure you will enjoy cooking.
Ingredients:
For chicken:
12 cups water
4 fresh ginger, peeled and sliced
1 teaspoon salt
3 cloves garlic, peeled
1 whole chicken
2 tablespoons sesame oil
2 teaspoons soy sauce
For rice:
2-3 cups Jasmine rice
Vegetable oil
3 cloves garlic, minced
1 fresh ginger, peeled and sliced
6 cups reserved stock from boiling chicken
2 tablespoons sesame oil
1/2 teaspoon salt
2 tomatoes, sliced
2 cucumbers, sliced
Procedure:
For chicken:
1. Bring 12 cups of water with ginger, salt and garlic to a boil in a large pot.
2. Put chicken in the boiling water and let it simmer for 5 minutes.
3. Turn off the heat, cover the pot and let the chicken cool for 20 minutes.
4. Repeat the boiling and cooling process one more time.
5. Set chicken aside when cooked and tender.
6. Remember to reserve the chicken stock for the rice.
7. Plunge the chicken into ice-cold water for 5 minutes to prevent over cooking and to tighten its skin.
8. Brush on a mixture of sesame oil and soy sauce on the chicken, then let it cool at room temperature.
For rice:
1. Wash rice thoroughly and drain.
2. Heat vegetable oil in a pot and fry garlic and ginger until golden brown.
3.Add the drained rice and fry for 3 to 4 minutes before pouring in 6 cups of chicken stock and adding sesame oil and salt.
4. Cook the rice uncovered until the broth is absorbed.
5. Finally, cover the pot tightly and reduce the temperature until the rice is cooked.
6. Cut the chicken into pieces, then serve over the rice and garnish with tomatoes and cucumbers.
7. Add chili sauce or other spices to taste.
The Satay and Hainanese Chicken Rice recipes are just simple tastebud teasers to give food lovers an idea of what the annual food festival has to offer. After savoring a preview of what Chinese cuisine-infused Singaporean food is all about, expect a bigger culinary feast in next year’s Singapore Food Festival.
It was honor to observe a cooking demo from Violet Oon, dubbed as Singapore Food Ambassador. She is one of Singapore’s leading food gurus and is known as much for her cooking as for her opinions on food. She is considered one of the leading authorities on Asian cuisine with a particular emphasis on Peranakan Food. Violet is also a respected cookbook author and food researcher. Her appointment as consultant to the Singapore Food Festival 2009 is particularly meaningful to her as the theme is Peranakan, the culture she belongs to.
Watch the 35 minute video as she demonstrates two recipes: Nonya Bak Chang and Babi Asam. She interspersed her cooking tips as she demonstrated the recipe. The recipe is a bit complicated to cook but you will learn some asian cooking tips just by watching the video. Now if you want to experiment, go ahead. The sweet potato dumplings taste so good.
Cooking Tips
1. Saute with a nice gentle sizzle not too loud sizzle . Chinese stir fry cooking involves high sizzle but not Peranakan.
2. Cook by smell.
3. Most peranakan dishes boil pork, slice it for that even look, then stir fry it
4. When boiling sweet potato, keep water for soup stock
5. Metal masher is better to use for mashing sweet potatoes
6. Don’t put less in a traditional dish. If rich foods are cooked in its right richness, you tend not to eat a lot.
7. This food should not be eaten every day. In the old days, it was eaten once a year.
8, Enjoy food three times a month. Rest of the month, eat plain like steamed fish or plain rice. When you cook for guests, the point is how to impress them. Cook really yummy for guests.
9. Coriander powder is important in Peranakan cooking. Never buy powder form. Toast the coriander in the over oon14for 10 to 15 minutes but stir every 5 minutes. It has to smell cooked but not burned.
10. To prevent spillage on the floor, use a mixing bowl three times the size that that you would need.
11. the smaller the pot the better. Deep fry is about how high the oil is.
12. When eating in a restaurant, feast with your eyes, your smell and lastly, the taste
13. Drain/dry the meat before cooking so that there is no water layer that prevents spices from reaching the meat.
Here are the recipes demonstrated by Violet Oon.
Held to commemorate a hero of ancient China, the Dragon Boat Festival is celebrated in Singapore with thousands of pyramid-shaped glutinous rice dumplings and a Dragon Boat Race. The poet Ch’u Yuan drowned himself in protest against injustice and corruption. It is said that rice dumplings were cast into the water to lure fishes away from the body of the martyr. This act is remembered by the eating of “chung”, glutinous rice dumplings. Dried lotus and pandan leaves flood the markets a few days before the festival on the fifth month of the lunar calendar as the dumplings are wrapped up tightly in these leaves. The steamed glutinous rice encloses a variety of fillings from pork to mushrooms, red beans, chicken, and mung beans. The Peranakan version isa delicious variation. In the past, lotus leaves were not as a vailable so Peranakans used the gigantic fragrant pandan leaves to wrap their bak chang. In addition to the traditional ingredients of diced pork, Chinese mushrooms and preserved melon was added to the local recipe by the Baba Chinese. The new recipe also includes pounded coriander seeds and lots of sugar.
Nonya Bak Chang: Singapore-Style Dragon Boat Festival Dumplings
INGREDIENTS FOR THE RICE
1 1/2 kg glutinous rice
4 tablespoons water
1/4 teaspoon salt
A few drops of blue food coloring from the Bunga Telang
METHOD
1) Pick through the glutinous rice and discard the transparent grains. These are plain rice grains. Wash well 2 to 3 times. Soak 3/4ths of the grains overnight in water.
2) Color 5 cups of tap water in blue with about 6 to 7 drops of food coloring. Or boil about 1/4 cup of dried Bunga Telang flowers in about 2 cups of water for 2 minutes. Drain and cool. Soak the remaining rice grains in this water. You may want your dumplings to be more blue so soak about 1/2 of the rice grains in the blue water.
3) Drain the rice grains and place int he steamer. If the holes are too large, line the bottom with a piece of cloth. Mix the two types of rice grains. Steam over high heat for 1 hour.
4) In the meantime, mix the water with the salt. After the rice has been steamed for 20 minutes, lift the lid of the steamer and sprinkle 1 tablespoon of water over the rice. Mix it well with the rice.
5) Cover the lid and repeat this twice til the water is used up. The dumplings should be formed and folded in the pandan leaves while the rice is still warm. If it is cold, it will not bind well.
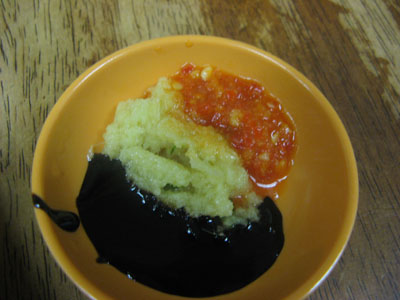
THE FILLING: Kueh Kledek Nonya
Sweet Potato Dough
350g glutinous rice flour (3 elephants) – 1 rice bowl
2 to 3 tsp rice flour
800g sweet potatoes, steamed and mashed with 1 tbsp sugar
2 eggs
1/2 tsp salt
1/4 to 1/2 cup water to mix to a firm dough
Sieve the 2 flours and add mashed sweet potatoes, salt, eggs, and water to mix well. Keep aside.
Filling
1 kg belly pork without the skin
200 g preserved winter melon, diced
10 dried mushrooms, soaked til soft, drained, squeezed dry and diced
5 tbsp lard or oil
60g garlic pounded til fine
200g shallots, pounded
1 tsp salt
300g to 350g sugar
1 1/2 tbsp white pepper powder
4 tbsp dark soya sauce
6 tbsp toasted pounded coriander seeds
To fry
2 lt vegetable oil
METHOD
1) Boil the pork for 30 to 40 minutes in enough water to cover. Cool and dice. Keep the water.
2) Fry garlic and shallots in the oil, add pork, sugar, salt, pepper, and soya sauce. Fry well and add mushrooms, melon, sugar, pepper, salt, and cook for 30 minutes. Add coriander, stir well, turn off heat. Cool and store in the fridge. This can be done a day ahead.
3) Fill the sweet potato dough with the filling and deep fry over medium high heat til the sweet potato dumplings are golden brown and float to the surface.
TO WRAP THE DUMPLINGS
Watch this video demonstration
15 large pandan leaves. These are only available in markets just before the festival. Otherwise, you will have to order them from your favorite vegetable stall.
1 recipe of filling
steamed glutinous rice
a roll of raffia
METHOD
1) Traditionally, the dumplings are formed into the shape of a pyramid with a three-sided base. If you follow the illustrations, you cannot go wrong. You have to pack the dumpling so that the glutinous rice is very firm. For those who just like the flavor, line the bottom of the casserole with pandan leaves, top with some fillings and cover the glutinous rice. Pack it down very tight, top with pandan leaves, an dsteam.
2) Purists will have to do it the right way. Tie 17 raffia strings measuring about 40 cm long together on a pole.
3) Trim both ends of each pandan leaf. fold it over to form a pocket. Place about half a handful of glutinous rice in the pocket and spread it out to form a hollow. Fill the hollow with the filling and fold the top over using your other hand to push both sides in.
4) Fold the two sides of the leaf over the dumpling and cut off the excess leaf. Tie with raffia to secure. Trim off the leaves to form neat parcels. When all the dumplings are formed, remove from the pole and plait the end of the strings together.
5) Boil for 2 hours, remove and hang to dry. The dumplings are usually eaten the next day and can keep for up to 4 days outside the fridge. If you like them hot, just steam them again before eating.
Babi Asam: Spicy Pork in Tamarind Sauce
INGREDIENTS
500g to 700g belly of pork
5 tbsp vegetable oil
1 1/2 tbsp pounded salted soya beans (taucheo)
2 tbsp tamarind pulp – about 50 g
3 cups water
1/2 tbsp dark soy sauce
8 nos green chillies, slit lengthwise from the stalk til the end
5 nos red chillies, slit lengthwise from the stalk to the end
A pinch of salt, to taste
1 to 2 tbsp sugar (optional and to taste)
Rempah (Spice Mix)
5 nos candlenuts (buah keras), washed and rdained
20 nos shallots, peeled
1 tbsp shrimp paste (belacan)
METHOD
1) First, prepare the spice mix. Grind all the ingredients together til you get a semi fine paste.
2) Cut the pork into bite-sized cubes. Heat a frying pan til hot, add the oil and when it is hot, add the rempah and stir-fry til fragrant and the oil exudes. This will take around 5 minutes.
3) Lower to medium heat and to prevent burning, sprinkle a little water on the spice mix, add the salted soya bean paste and the meat. Stir-fry well for 3-5 minutes.
4) In the meantime, mix the tamarind pulp with the water and knead well to extract the juice. Discard the seeds and pulp.
5) Add the tamarind water and dark soy sauce to the pork mixture.
6) Boil and simmer til the liquid is reduced by half.
7) Add the 2 types of chillies and continue simmering for 20-30 minutes til the pork is tender. Taste, and if you like, add salt and sugar and simmer for another 5 minutes til cooked through.
Serve with steamed rice as part of a Peranakan meal.
Author: JOHN REY
| Posted at: 12:08 AM |
Filed Under: CHICKEN,
PHILIPPINES
|
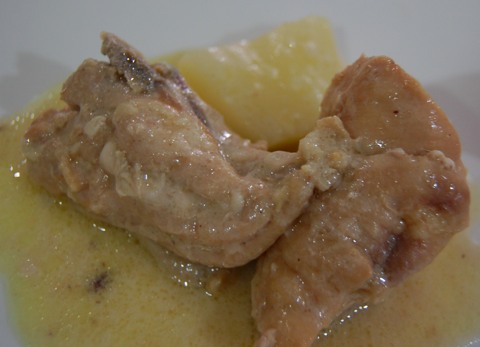
Chicken Adobo in Coconut cream is my favorite adobo of all time. It’s actually a comfort food, a childhood memory. Sadly, I don’t often cook this because two family members don’t really like dishes with coconut milk. This is actually simple to cook. If you don’t have time to prepare coconut milk, just use the ready to mix coconut milk powder at the grocery.
Ingredients
1/2 head garlic, minced
1 medium onion, sliced
1 1/2 kilos chicken cut into serving pieces
2 tablespoons cooking oil (I prefer Pure Olive Oil)
2 cups thin coconut cream (Check on how to prepare coconut cream or buy 2 packs coconut milk powder)
salt and pepper to taste
1 small green papaya (cubed)
1/3 cup vinegar
2 cups thick coconut cream (Check on how to prepare coconut cream or buy 2 packs coconut milk powder)
Procedure
1. Prepare coconut cream or if you are busy, just buy 2 packs coconut milk powder and follow instructions.
2. In a saucepan, saute garlic, onion and chicken pieces in hot oil.
2. Pour thin coconut cream and simmer for a few minutes.
3. When chicken is almost done, add the papaya, vinegar, salt and pepper.
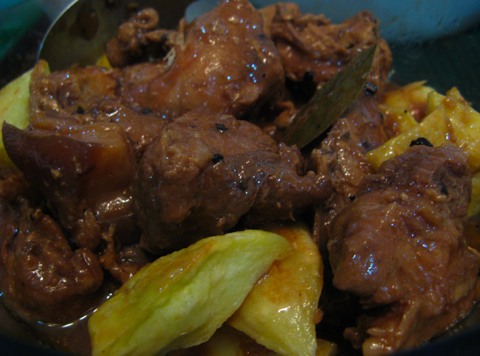
My husband is fond of buying me recipe books or any books about food. One such book is The Adobo Book (Traditional & Jazzed Up Recipes) by Reynaldo Gamboa Alejandro and Nancy Reyes-Lumen. Not only do you get recipes of various authors but trivia and essays on adobo. The Personal Styles reflect the cook’s preferences. You should read the more than 100 adobo recipe variations ranging from Pork Adobo in Buco Juice, Adobong Tsino, Microwave Adobo, Fresh Oysters Adobo, Adobo sa beer and so much more.
What I’d like to show from the “Adobo Book” are tips for cooking adobo which is entitled the “10+ Commandments in Cooking Adobo”. I am sure you will learn a tip or two even if you have been cooking adobo for years.
1. Pork Liempo is best, tastiest and is better with skin-on. When cooked, becomes sticky and gelatin-y and helps thicken the sauce gloriously.
2. Simmer! Cook meats in low fire from start to finish (till meats are tender) and sauce is reduced [Cook uncovered in the last 10 minutes]
3. The usual ratios are
1 kilo meat (chicken or pork): 1/2 cup native vinegar (reduce accordingly to acidity of vinegar).
1 kilo meat (chicken or pork): 1/2 cup vinegar: 1/4 cup water
Soy sauce can range from 2 tablespoon to 4 tablespoon per 1/2 cup vinegar
1 kilo meat: 1/2 cup vinegar or acid: 1/2 tablespoon coarse salt
![[Valid Atom 1.0]](valid-atom.png "Validate my Atom 1.0 feed")